Showing posts with label diy. Show all posts

Friday, 6 May 2011

DIY!

On Saturday we went to IKEA and my mother bought a new wash-stand with basin. It was late when we came home and we had a party to attend to. On Sunday we continued the party and went fishing and then on a picnic :) I was exhausted!
But when we came home (yes we still haven't finished our apartment!) there was work waiting for us, that is my boyfriend and me. My mother and sister started putting together the wash-stand and in the middle of it had to go somewhere. So we picked up where they left and it took us about three hours to complete it.
sorry about the photos. I'm really not a pro

We started with the disassembly of the old sink and cabinet. It was quite easy to remove all of the plumbing. If you do this just be sure to put a bowl underneath, because there is water stored in the siphon that prevents the smell to come back to the bathroom. Then we disconnected the tap. Again be sure to close the water before doing this! This can usually be done by turning the valve under the sink. If you can't find a valve you'll have to turn the water off for the whole building. When you have done this, turn the tap on to drain out the remaining water in the system.

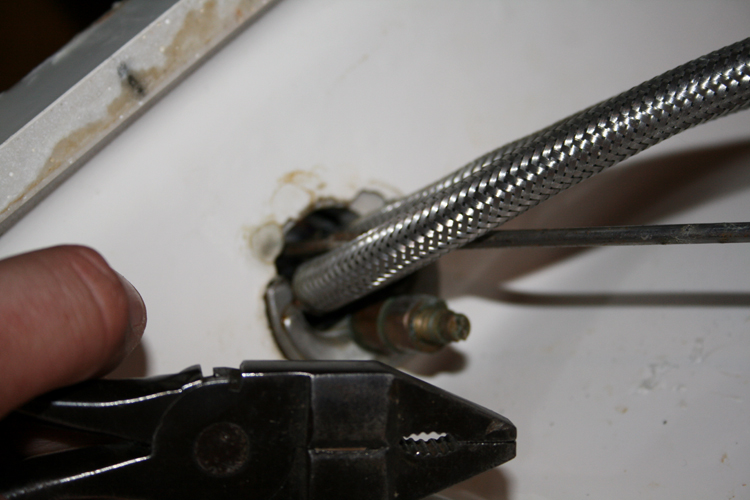
I advise you to put a cloth in the drain tube or it will smell badly! To take the tap of the sink, we had to unscrew the nut - see the picture.

It is always easier to put something apart and I think you will manage the rest :) Just one more tip. How to get rid of the silicon that remains on the tiles? It is very simple with the razor that you use on the ceramic stove - like the one on the picture. Then just clean the residue with alcohol.


So to the harder part - putting it back together. My advice - follow the instruction carefully! IKEA instructions are really detailed and it is quite easy to do it!

Once you put the whole thing together, you will have to fix it to the wall. First mark where you need to make the holes and then carefully start making them. Drill a small hole and then use larger drill and expand the first hole, so you don't break the tile. We cooled the drill with water, because the heat would make the tile break quicker. Then we fixed the cabinet on the wall. On the photo you can see which thing goes first :)
Make sure that the cabinet doesn't lean on one side!

Then put the sink on the wash-stand and secure it with silicon. Next step is to do the plumbing... About this next time! See ya


Tuesday, 12 April 2011

DIY!

Another project I've been working on for our new home is sunburst mirror. I found the tutorial on this amazing blog Isabella & Max Rooms written by Janell.

BWS tips button

You can find her tutorial here. Her mirror looks amazing and her home is really beautiful!

She inspired me to make my own. The first problem was where to find a mirror. It's not so easy in Slovenia to find cheap mirrors with frame. So I went with one without it. I found it at Dipo for 21 eur. Next I needed some branches. I found them at IKEA for about 2 eur for one pack of 20, maybe 30. I needed five of them. I got lucky and they were already painted white.
Then I followed the instructions and realized that it would look so much better if I glued the branches on the back... Of course I thought about that after I glued quite a lot of them already :) After that it went perfectly! I was done in one day!

Then the real problems started. Because the mirror has no frame it also had nothing to hang it on the wall. I don't know where will we put it, so the gluing it to the wall wasn't an option. We went to a hobby shop, then to frame shop and no one knew what to do. At the fifth store the saleswoman suggested that we 'glue' a hanging hook with silicon. We did it and it looked great! Till the next morning... when we found it on the floor, luckily not broken, but the branches did fall of or brake.
Now we glued hooks with two component adhesive, fixed the branches and ta - da!

It will look amazing in our home when we finish it! Comments always make me happy! :)

And today I have a request for all of you. Please vote for my sunburst mirror at Pattex Power Competition. Just click the button that says 'Glasuj'. You can vote every day till 24/06/2011. Thank you!

Monday, 14 February 2011

DIY!

This weekend my boy and were working on our chairs. I wrote about them already and now we are finally renovating them.

We are painting them black and making new upholstery. We got the chairs for free, the fabric is from IKEA (about 5eur/m), the foam is from another project so it was kind of free and we had to buy the stapler and the paint (all for around 35 eur). That sums up about 70 eur, but I guess we won't need all the fabric we bought.

This is how they looked before.


We had to repair them a bit and then painted them black. The last picture shows new upholstery and my BF at work.


They are going to be awesome!